
Most smartphone users prefer the screenshot functionality to capture what is visible on the screen. But what if you want to screenshot an entire webpage, a very long chat thread, or a complete document? Rather than having to take several screenshots and stitch the pieces together yourself, iPhones with iOS 13 and later have a feature built into them: scrolling screenshots, otherwise referred to as full-page captures
With iOS 17 and newer, this feature is more stable, faster, and compatible with more apps. It’s perfect for students capturing notes, professionals saving contracts or emails, and everyday users archiving conversations or articles. This guide will walk you through everything you need to know, from step-by-step instructions to troubleshooting, file management, and app compatibility.
What is a Scrolling Screenshot?
By using a scrolling screenshot function, you can capture the whole screen area vertically, then stitch it into one connected digital file. iPhone usually saves scrolling screenshots as PDF files, which users can easily share or mark up. It’s perfect for:
- Capturing whole webpages or articles
- Saving threads of emails without leaving out a message
- Archiving Messages’ chat conversations
- Saving notes or PDFs in their entirety
Prerequisites to Take a Scrolling Screenshot on iPhone
Before you begin, check these things:
- Your iPhone runs iOS 13 or a newer version (iOS 17 is best)
- You’re using an Apple app that is compatible with this feature, like Safari, Notes, or Mail
- Remember, you’ll end up with a PDF file, not a picture
Also see: A Quick Guide on How to Take a Screenshot on Mac
Steps to Take a Scrolling Screenshot on iPhone
1. Open the Content You Want to Capture
Browse to the internet page, email thread, or document that you want to capture as a screenshot. The native Apple apps, such as Safari, Mail, and Notes, provide optimal performance for scrolling screenshots.
Note: The function of scrolling screenshots fails when you access certain third-party applications.
2. Take a Regular Screenshot
Use the standard button combination:
- For Face ID iPhones: Press the “Side Button” + “Volume Up” simultaneously.
- For Touch ID iPhones: Press the “Home Button” + Side (or Top) Button simultaneously.
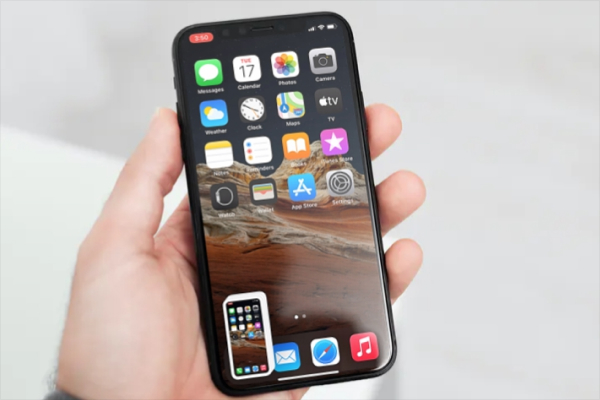
A preview thumbnail will show up in the bottom-left corner after the screen flashes.
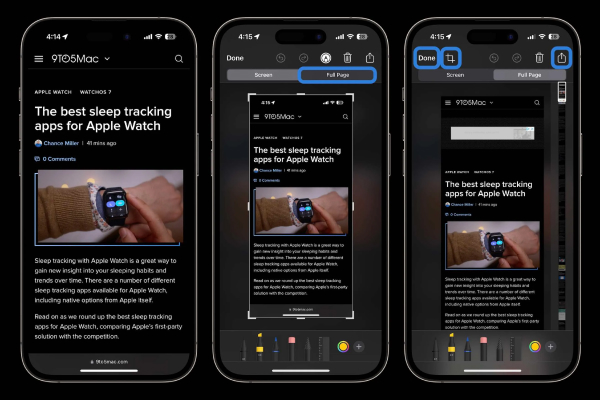
3. Tap the Screenshot Thumbnail Quickly
The thumbnail automatically disappears after a few seconds, so you must tap it right away to launch the “Markup” screen. You must retake the screenshot if the thumbnail vanishes from the screen.
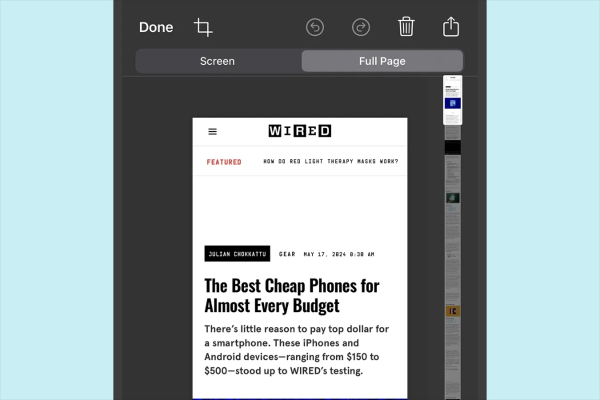
4. Tap “Full Page” at the Top of the Screen
When you look at the Markup view, you’ll notice two tabs:
- Screen: This shows you the regular screenshot.
- Full Page: This lets you see everything you can scroll through.
To switch to the scrolling screenshot mode, just tap “Full Page”. You’ll see a scroll bar on the right that gives you a preview of how long the whole thing is.
5. Edit or Crop If Needed
You can use the crop tool to cut parts of content from its upper section, lower portion, or central area. The tool functions best for removing advertisement elements, superfluous headers, or irrelevant sections. You can also highlight using:
- Pens, markers, or highlighters
- Text boxes
- Signature tools that are excellent for signing PDF contracts
6. Save or Share Your Screenshot
When you’re done, tap “Done” and then “Save PDF to Files” to save the scrolling screenshot to your iPhone. You can also tap the “Share” icon to:
- AirDrop it to another Apple device
- Email or message the PDF
- Open it in apps like Books, Dropbox, or Google Drive
All full-page screenshots are saved in the “Files” app under the location you choose.
Which Apps Support Scrolling Screenshots?
Scrolling screenshots currently work in:
- Safari
- Notes
- Messages (limited)
- Apple Books (for certain views)
Third-Party Apps for Scrolling Screenshots
Tailor: Stitches multiple screenshots together automatically.
Picsew: Automatic and manual stitching, with options for customization.
LongShot: Capture and stitch images with guided scroll.
Tips for Power Users
Automate screenshot storage to specific folders with the help of the Shortcuts app.
The PDF to JPEG Converter app transforms PDF files into images when required.
With Markup, you can apply highlights to screenshot sections for sharing purposes.
The Notes app provides an easy way to store screenshots with automated archiving features.
Troubleshooting: Why Can’t I Take a Scrolling Screenshot?
It is necessary to have iOS 13 or later installed on your device (with iOS 17 being the preferred version).
If Chrome fails to capture a complete page, you should shift to the Safari browser.
Click the screenshot preview quickly; if it disappears, you have to take a new screenshot.
Conclusion
Most iPhone users fail to notice the effective functionality of scrolling screenshots, which serves as a basic but sturdy feature. A few quick touches on your screen produce well-organized PDF files containing saved webpages, conversations, or documents. The feature helps you preserve notes, presentation materials, and group chats without any difficulty.
You will find this feature increasingly helpful and relevant because Apple continues to develop both the Files app capabilities and PDF functions in iOS platforms. Now, after learning this technique, you can implement it to enhance your iPhone content capture and sharing abilities.
