
Whether we are at home or outside, we all carry our phones with us at all times. That’s what they are meant to be, to be handy and easy to carry. Some people even tend to carry their phones along in restrooms. But what if you accidentally drop your phone in the sink—or anywhere else it shouldn’t be? Or maybe you accidentally spill your drink all over your phone. Accidents can happen at any time and at any place. Moreover, you cannot deny the fact that going a day without a phone is a task, especially if you handle most of your work-related stuff on your device. So, what shall you do in case your phone ends up water damaged?
If you are also looking for an answer for the same question, then surely this post is for you. Here, we have outlined 8 essential steps to fix your phone after water damage. So, without any further ado,let’s get started…
8 Essential Steps For Fixing Water Damaged Phones
Here are the 8 most important steps that you will need to take in case you end up with a water damaged phone. Following these steps will allow you to have your phone working in all situations, whether you are picnicking or riding on a boat. Take a look at the steps…
1: Act Promptly
Immediately after you have got your phone submerged in water (due to whatever reasons) act promptly. Don’t waste any moment thinking about what to do next. Immediately remove your phone from the water and Power It Off instantly without wasting any moment. Doing so will prevent it from further damage, such as short-circuits.
After that, remove all the accessories connected to your phone for enjoyment, such as headphones and other devices. For instance, if you use wireless headphones, be sure to disconnect and remove them as well.
2: Remove SIM Card, Memory Card, Battery and Case

The next step is to remove the SIM card, memory card, case and battery. Know that water can get stuck inside the device, including the components and damage internal components. Hence, you are advised to immediately eject these components.
You are advised to immediately remove the protective case of your smart device to allow airflow. Now, open the back of your phone and remove the battery, SIM card, and memory card. Doing so will protect your data and get them dried faster. Keep these components safely so that you can use them again when your phone gets okay.
3: Dry the Exterior
Once you have removed all the components, it’s now time to dry the exterior of your device. Be gentle when you do it. Also, it is crucial to use a lint-free cloth or paper towel to dab your phone dry. Gently wipe the surface of your device to absorb moisture. Avoid rubbing, shaking or tilting your phone as it can cause significant damage to the sensitive parts of your device. Also, hold the phone upright to drain from the charging and headphone ports.
4: Remove Trapped Water (Without Heat)
Avoid using a hair dryer or any other electric equipment to remove trapped water from your device. This is because heat from electric equipment can warp delicate parts of your device or worsen damage. Also, avoid keeping it under the direct sun. Instead, keep it in a cool, dry place.
You can use a handheld vacuum to remove trapped water. All you have to do is gently vacuum around the phone’s edges and ports to help draw out trapped moisture. Alternatively, you can use a can of compressed air on a low setting to gently push or blow moisture out of the ports.
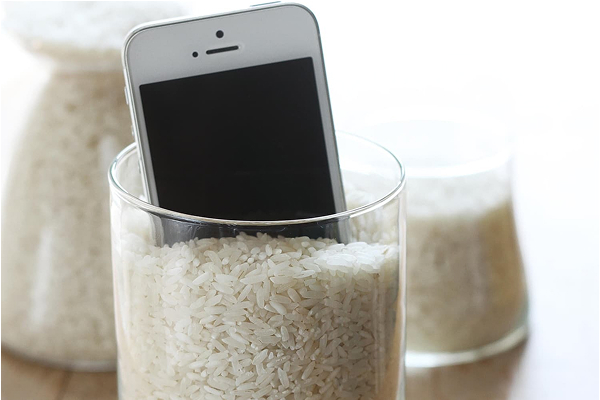
5: Draw Out the Residual Moisture
If your phone was fully submerged, residual moisture may remain inside even after drying it with a handheld vacuum. In such a situation, you are advised to push the residual moisture out of the phone to fix water damage. Use Silica gel packs to draw out residual moisture inside the phone.
Silica gel packs often come along with new bottles, electronics and other items. If you have them, place your phone with some silica gel packs in an airtight bag or container for at least 24 – 48 hours. It will absorb residual moisture instantly. If you don’t have gel packs in hand, then keep your device in a packet of uncooked rice for at least a day or two. Avoid checking your phone every hour or so. You have to be patient here!
6: Turn Your Phone On
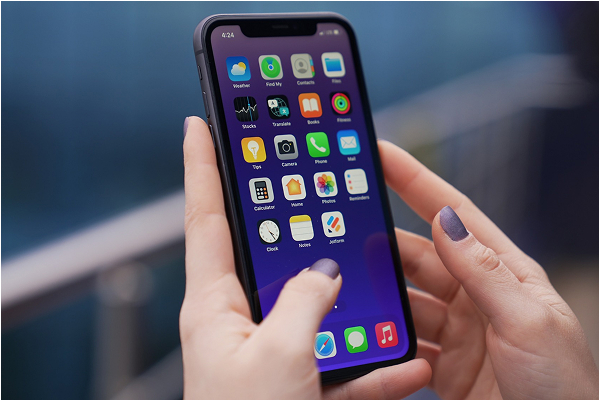
After you’ve allowed your phone to fully dry fully, turn your device on. If your device doesn’t turn on right away, charge it fully and try again.
Step 7: Check Your Phone’s Functioning
If your phone turns back on, try testing it. Insert the SIM card, memory card and the battery. Now, power on the device and check its functions, such as camera, charging, speakers, microphones and other functioning to ensure it is working fine. If all goes well, then great! Keep your device in a dry place, away from direct sunlight and heat. If your phone doesn’t work properly, then you are required to take it to professionals.
8: Seek Professional Help
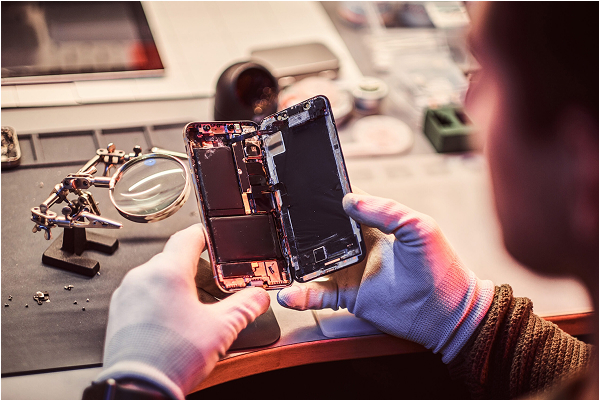
If you have tried all the steps outlined above and still your phone is not working, then it’s time to seek professional help. Make sure you visit an authorized repair centre for the best repair. Avoid visiting random technicians or service centres to get your water damaged phone fixed. This is because many unverified technicians may replace parts with subpar components, leaving you with a lower-quality device.
Let’s now take a look at some DO’s and DON’Ts of fixing a water damaged device. Here we go…
Essential Do’s and Don’ts After Water Damage
Here are the do’s and don’ts to keep in mind when fixing your phone after water damage. Take a look…
DO
- Act promptly as soon as you see your phone submerged in water
- Power your device off without wasting any moment
- Back up data as soon as the phone is functional
- Buy a waterproof case for future protection
DON’T
- Use a hair dryer, microwave or any other heat or electric item to dry your device, as it can worsen damage
- Power the device on before it has fully dried
- Plug in the charger until you’re sure the phone is completely dry
- Press buttons excessively or aggressively as this may push water deeper
Top 5 Tips to Prevent Water Damage in the Future
- Invest in High-Quality Waterproof Cases: Spending money on professional fixes costs a lot of money. Hence, you are advised to invest in a high-quality waterproof case to protect against water damage in the future.
- Avoid Using Your Device When Indulging in Water Activities: Well, it is a no-brainer that you should avoid using your device when you are indulged in an activity that involves water, such as washing hands, swimming, drinking water or any other liquid, and so on.
- Buy Phone with Water-Resistance Ratings: Most phones now come with water-resistance ratings (like IP67 or IP68). You can invest in such devices; however, it is worth noting that these ratings apply to controlled lab conditions. This means that they give protection from water damage to a certain limit only. You still need to be cautious when using your device while indulging in water activities.
- Consider Insurance or Protection Plans: There are insurance and protection plans available for phones to cover accidental damage, including water damage. If you want, you can invest in a protection plan. This is specifically advised for people with high-end or flagship devices, as repair cost can sometimes go really high.
- Be Mindful When Using Your Device: Last but not least is to be mindful when using your device. Avoid multitasking as much as possible as most accidental damages occur due to multitasking.
The Bottom Line
So, these are the 8 essential steps that you can take to fix your phone after water damage. Undoubtedly, water damage can be daunting and stressful, especially if you use it for your work as well. But worry not! With the steps outlined above, such as retrieving your device and powering it off instantly, removing all the components, drying your device, removing trapped water and so on, you can easily get rid of the issue without even visiting a professional.
We’ve also included some key DO’s and DON’Ts to help you prevent further damage after your phone is exposed to water. Also, do follow our tips to prevent water damage in the future and have your phone working its best at all conditions.
It’s now time for some important FAQs. Take a look…
FAQs
1. My phone is water-resistant. Do I still need these steps?
Yes. Even with water-resistant phones, you need to take these steps to remove water from your device. This is because water-resistant ratings apply to controlled lab conditions. And real conditions are often different from those lab conditions. Water resistant devices are designed to withstand splashes or brief immersion, but in high-pressure water, soapy water or long submersion, their functioning also gets disrupted.
2. How long should I leave my phone in silica gel or rice?
For at least 24–48 hours, so that your phone gets dried properly during that time. Also, avoid checking your device again and again when kept in an airtight bag with silica gel packs.
3. Does using rice really help?
Well, it helps a bit here and there, but it is not as effective as silica gel packs. Also, there are chances of your phone catching dirt and dust when placed in rice.
4. Can I use a hair dryer to draw moisture from my water damaged device?
No, it is strictly prohibited. You are advised to use compressed air or a handheld vacuum to remove trapped water.
5. I got my phone briefly exposed to water, but it turned on immediately and is working fine. Can I keep using it?
It might work now, but hidden moisture can damage internal components over time. You are advised to back up your data and closely monitor your phone’s performance.
6. When should I get professional repair?
When your device won’t power on even after trying all the steps outlined above. Aside from that, if you notice screen flickering, muffled speakers, or overheating, then take your phone to a professional to get it fixed immediately. Never use water damaged device, as it can be dangerous.
