The image quality of phones has increased immensely with time. Today, you can take high-quality images and edit them professionally using your phone. There is no need to use expensive desktop software to achieve good results anymore. Lightroom, Snapseed, and VSCO are some of the image editing apps through which one gets the ability to adjust the colors, brightness, and contrast, and remove any object that one might not want. These apps are easy to use and feature professional capabilities.
Whether you’re editing pictures to post on social media, your portfolio, or simply to keep for yourself, being able to edit your pictures via your phone saves you time and money. This tutorial is pointing out the best apps, the most important tools to use when editing, and the steps you need to take to make your photos amazing.
Top Mobile Photo Editing Apps
It is essential to know about the best mobile photo editing apps and tools to edit your photos professionally on your smartphone. Here are the best apps and tools available:
1. Adobe Lightroom Mobile
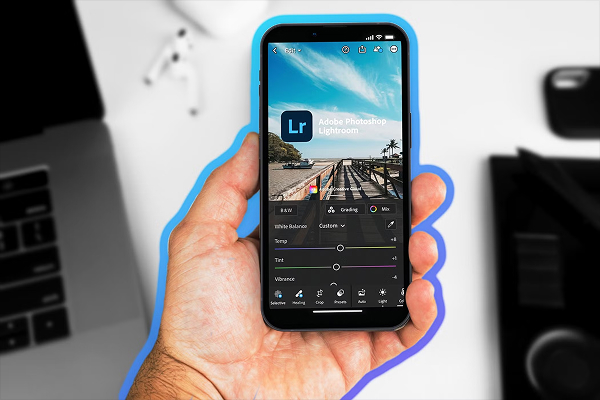
Photographers love Lightroom. The mobile version has the majority of desktop functions. You may affect exposure, highlights, shadows, colors, and presets.

- Provides professional color grading.
- RAW photo editing.
- In sync with desktop Lightroom.
2. Snapseed
Snapseed is easy to use and has precise control over advanced editing. Its healing tool and the possibility to implement edits in a particular area are especially popular.

- It has features such as curves, healing, and selective editing.
- Provides filters to make rapid changes.
- Allows fine adjustments of brightness and saturation.
3. VSCO
VSCO is often referred to as the go-to app for aesthetic filters and a creative community. Widely used by Instagram influencers and lifestyle bloggers, it’s considered an essential tool for enhancing visual content. Alongside its strong photo editing capabilities, VSCO also stands out among the Best Video Editing Apps, especially for those who prioritize minimalistic design and cinematic effects.

- Library of film-like presets (Kodak, Fuji, etc.).
- In-camera manual settings camera.
- Video editing features as well.
4. PicsArt
PicsArt is a photo editor with creative design. It is not just a classic editor- it permits photo manipulations, drawing, and even meme creation.

- Blending modes, such as in Photoshop.
- Background remover and collage maker.
- art-style filters and AI-generated effects.
Essential Editing Tools and What They Do?
1. Crop and Straighten
Cropping assists in re-framing your picture. Straightening makes sure that lines (such as horizons or buildings) are horizontal. Straightening tools come with automatic proposals, though you can manually adjust them to be precise.
- Use the rule of thirds to strategically position subjects.
- Have aspect ratio presets (1:1) Instagram, (9:16) Stories, etc.
- When designing content, leave room and text overlays.
2. Brightness and Contrast
Brightness increases or reduces the whole image, whereas contrast enhances the light and dark portions. Utilize slight adjustments of the brightness to improve underexposed shots.
- Add contrast to make photos three-dimensional and punchy.
- Add shadows and highlights to control it.
3. Exposure, Highlights, and Shadows
These adjust the light ingredients of your image. They are commonly the initial move towards the conversion of a dull photograph into an energetic one.
- Sky or background details can be regained by lowering.
- Shadows should be raised to add detail in the dark parts.
- Apply exposure in limited amounts- it applies to the entire picture.
4. Saturation and Vibrance
They both affect color, however, differently. Apply vibrance on portraits and saturation on landscapes. Do not make the skin appear excessively orange or red.
- All colors are subject to saturation.
- Vibrance enhances desaturated colors without saturating skin tones.
5. Sharpening and Clarity
Sharpening adds edges and definition. Clarity brings out mid-tone contrast, appearing punchy.
- Apply sharpening to bring out small details, such as leaves, hair, and cloth.
- Clarity is effective with nature, city, and black and white photos.
6. Noise Reduction
Noise is the graininess in low-light photos or high ISO photos. Noise removal evens out these flaws.
- Helpful in night photography or zooming with a smartphone.
- Consume in moderation to have sharpness.
- Integrate with detail enhancement tools.
Step-by-Step Guide to Editing a Photo Like a Pro

➢ Step 1: Choose the Right Photo
Begin with a well-composed and sharply focused photo. The lighting should be good. In case the photo is too blurry or dark, even editing will not be of great assistance.
➢ Step 2: Open Your Editing App
Launch your preferred app. Choose or upload your picture from the gallery. You may want to make a copy of the picture so that you do not ruin your original.
➢ Step 3: Start with Crop and Straighten
- Remove distractions
- Employ grid overlays for precise alignment
- Recompose for visual effect
➢ Step 4: Adjust Lighting First
- Slightly boost exposure if the photograph is too dark
- Balance highlights and shadows
- Refine whites and blacks for greater contrast
➢ Step 5: Tweak Colors
- Proper white balance to balance color casts
- Apply warm or cool colors to determine the mood
- Control a particular color with the adjustment of HSL (Hue, Saturation, Luminance) sliders.
➢ Step 6: Improve Details
- Crispen up small details such as eyes, text, or textures
- Use clarity to evoke structure
- Apply dehaze to misty or low contrast images
➢ Step 7: Use Selective Tools if Needed
- Lighten the face and not the background
- Make the sky darker or add more contrast in some places
- With portraits, blur the backgrounds slightly.
➢ Step 8: Apply Presets or Filters (Optional)
- Presets are used to ensure uniformity in pictures, particularly in social media themes.
- Lightly used- presets are supposed to complement, not dominate.
- Adjust the strength of the filter.
- Make your batch editing presets.
➢ Step 9: Save and Export in High Quality
- Select the maximum resolution
- Save as JPEG if it is a general-purpose image and PNG if it is graphics.
- Do not use apps that export compressed images
Advanced Tips for Mobile Photo Editing

- Use a Stylus for Precision: When selectively editing images, you have greater control using a stylus or Apple Pencil. It allows you to work accurately on small spots such as eyes, hair, or textured backgrounds.
- Light Your Photos Well Before Editing: When the light is good during shooting, editing becomes quite easy. Natural light or ring light will help take sharp and detailed photos with fewer shadows and improved contrast.
- Add Grain for a Film Look: A slight grain addition can make your photographs vintage or film-like. It is effective on portraits and lifestyle photographs, but must not be applied to images that are already noisy.
- Apply Split Toning for Mood: Split toning allows you to color highlights and shadows independently. Warm highlights and cool shadows will give a cinematic effect, or pastel colors will provide a dreamy look.
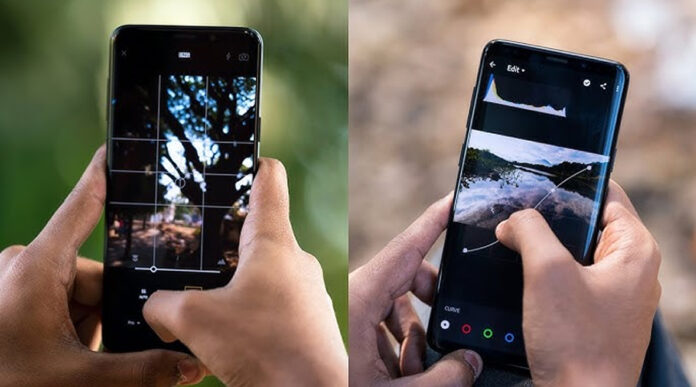
- Use the Curves Tool: The curves tool puts the contrast and the brightness under your complete control. Color grading can also be done by separately manipulating red, green, and blue channels.
- Create and Save Presets: Preset your favorite editing settings to quicken future edits. This is also good in making a consistent appearance in your photos, particularly when you want to use them on social media.
- Correct Lens Distortion and Perspective: Correct skewed angles with the geometry and lens correction tools. They are particularly useful when the photography is of architecture, real estate, or travel, and done with a wide-angle lens.
- Try Double Exposure for Artistry: Combine two photographs to generate fantasy or art images. When silhouettes are overlaid with textures or landscapes, the effect can be very striking.
- Zoom In for Detail Editing: When editing, always zoom up to see the flaws. This gives accuracy, particularly in sharpening, retouching skin, or removing objects.
- Keep a Consistent Visual Style: When editing on social media, choose similar tones and lighting to make one cohesive feed. This creates a personal brand and helps your images become more recognizable.
Conclusion
Professional photo editing on your phone has never been so simple. You can transform an average photo into a beautiful image with the help of the apps and some training. Basic tools such as brightness, contrast, and crop should be the starting point. Slowly discover more advanced options like selective editing and presets.
Over-saturation or drastic filters are some basic errors to avoid. The most important thing is to be consistent and subtle. Regardless of your level of expertise in the world of content creation, mobile editing gives you the freedom and the strength to make your photos stand out.

